If you ever wanted to enjoy a little drifting at night, Tamiya packaged up a nice light kit installation set for their 1/10 models. The kit is made simple to install and use. I fit it into my 458 Challenge fairly quickly. Here's what you'll need to get.
 |
| Pick up the TLU-01 option parts LED kit. |
 |
Everything you need is in the box one front and one rear lamp set.
I added another light set for the front because I preferred the front LED orange |
 |
| The module is light weight so not to hinder your car. |
 |
| The system is able t re-rout and use the cars battery conveniently. |
 |
| front and rear plugs. |
 |
| Quick test before wiring. |
The body can take two sizes of LED o3 and o5. Special adaptors are used for either size.
If you use the wrong ones it won't be a sure fit.
 |
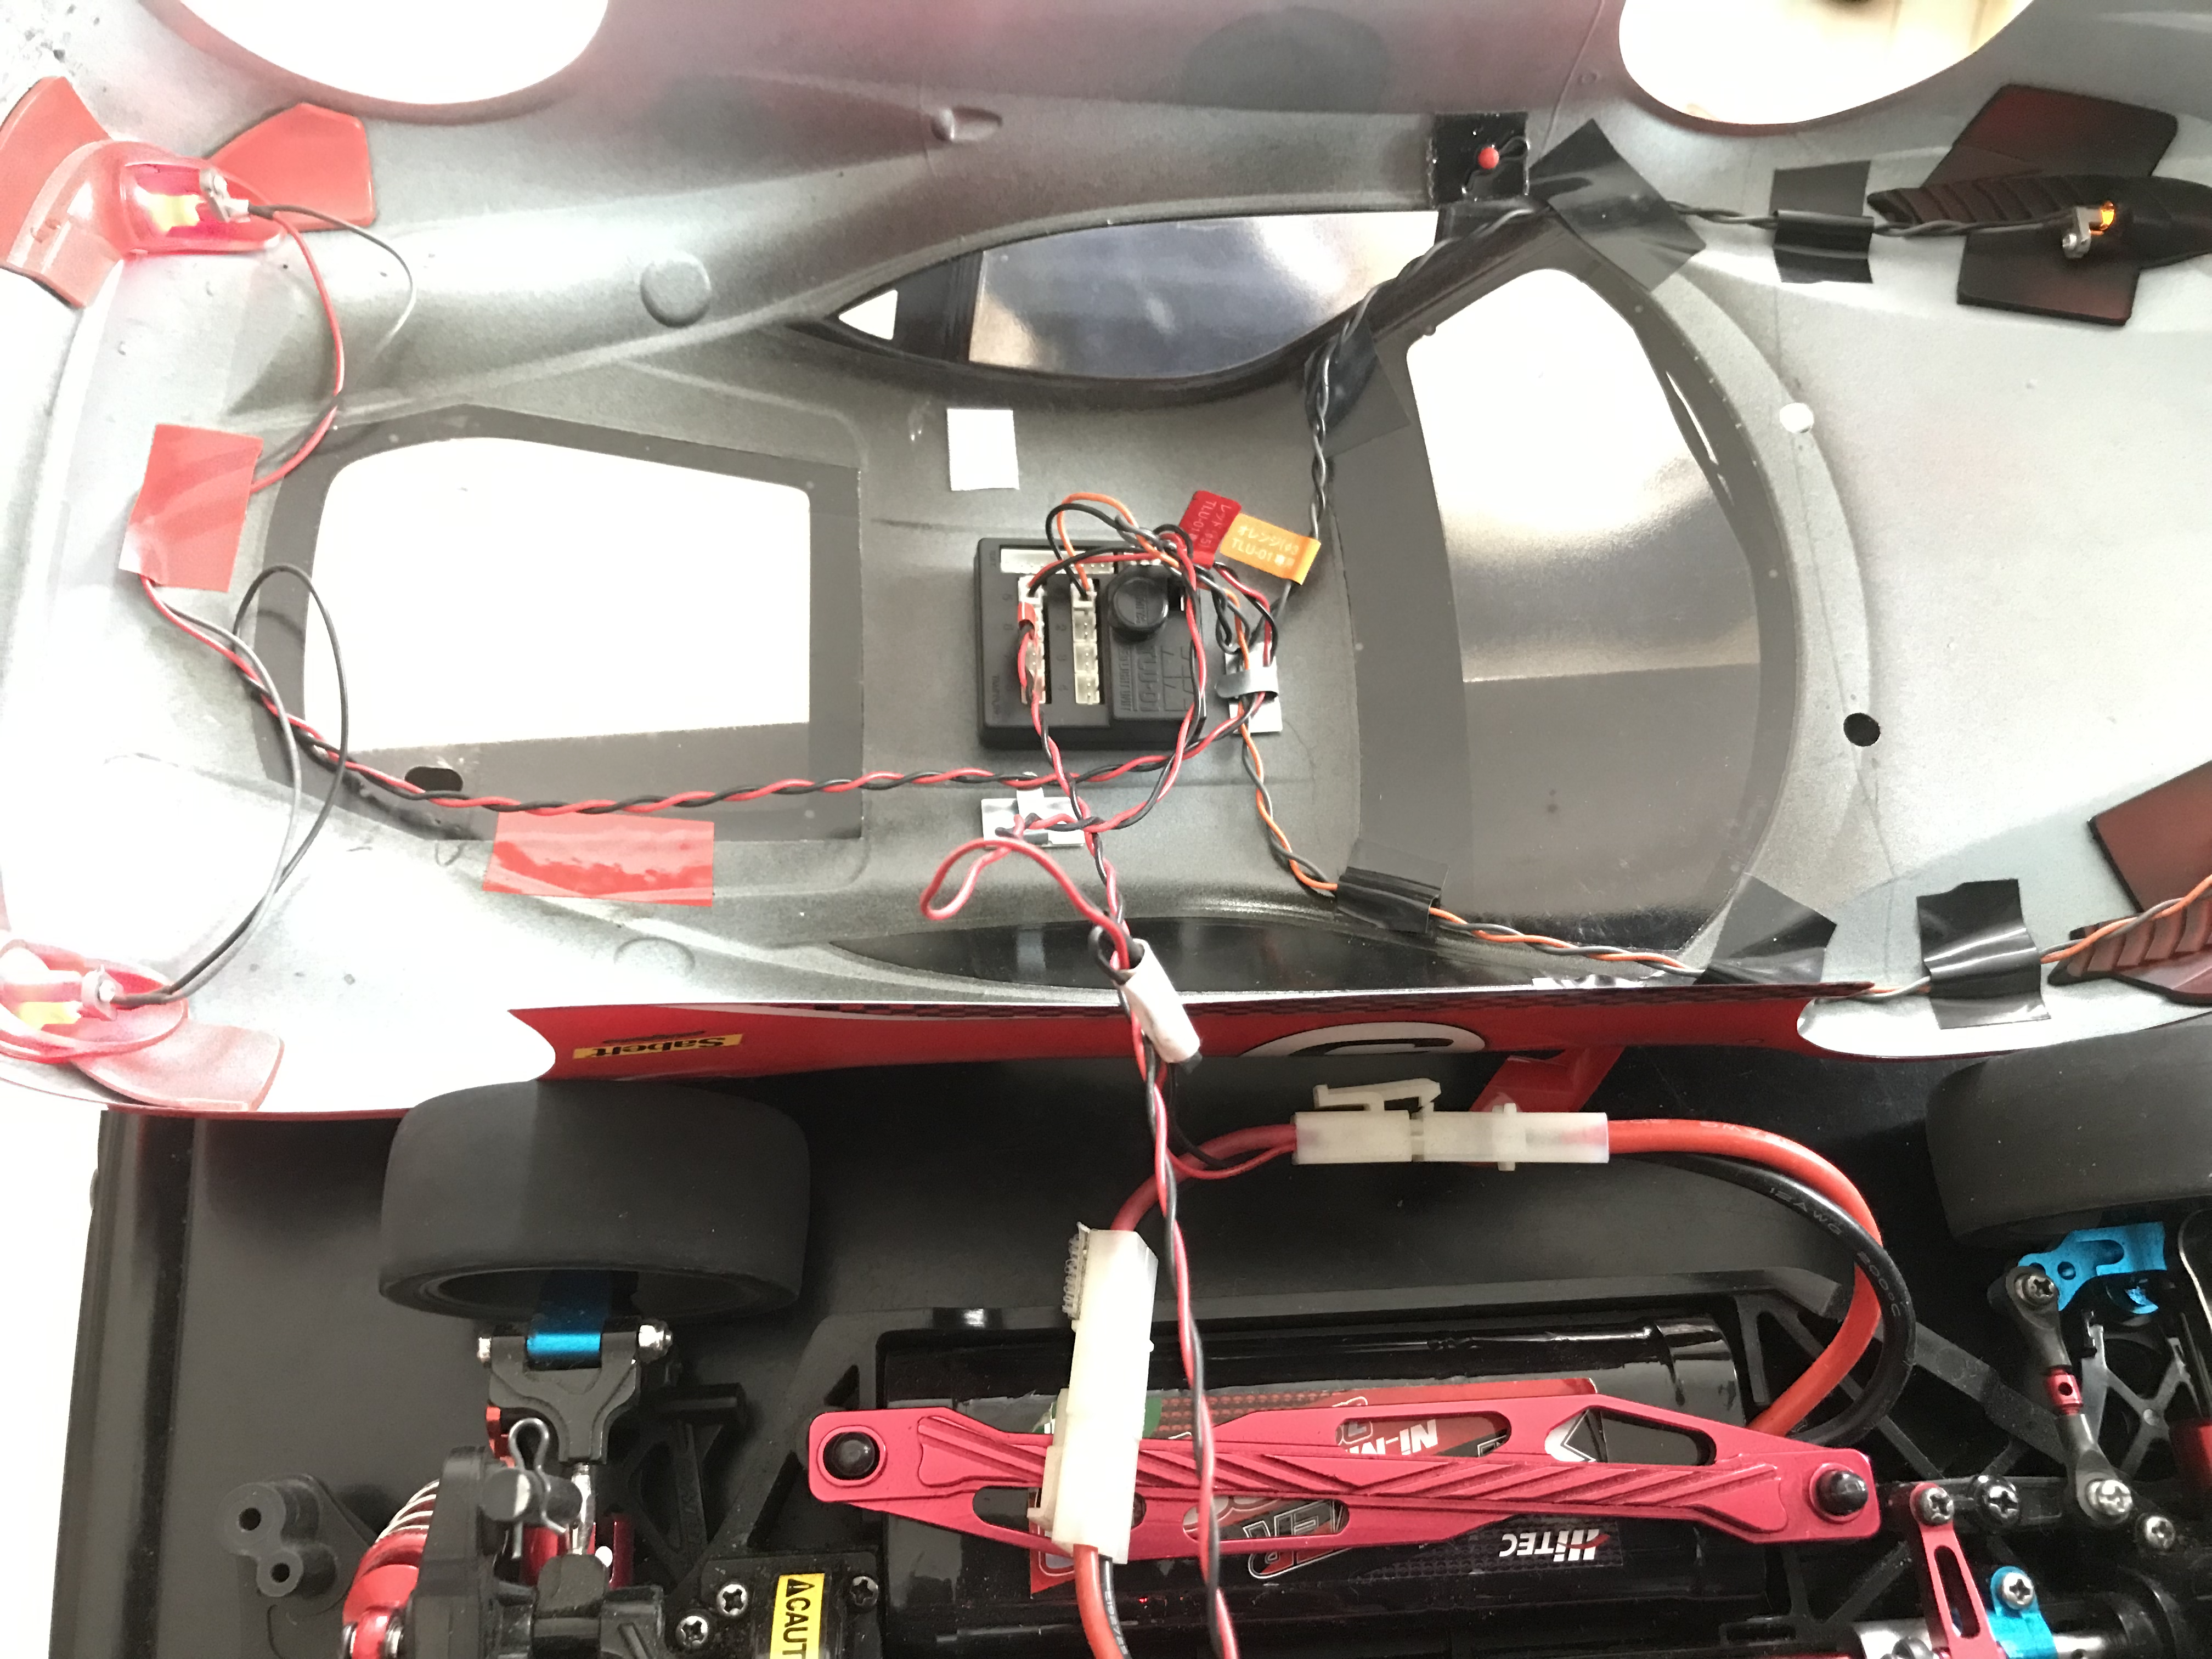
| Center the module and use supplied double sided tape to affix it to the body. |
If you position it right you can still turn on and off the lights without removing the body. Also consider the balance of the RC. Use some black electrical tape to help fasten the wiring and follow the contour of the body to prevent rubbing on any moving parts and to maintain a neat uncluttered look.
Once you've positioned everything the way you like it you are done. Pop on the body and turn off the lights. Because I changed the front LED to orange I have a spare white o5 set.